Creating a Campaign
Campaign Wizard
From the campaigns index, click the "Add Campaign" button in the top right-hand corner, this will take you to the campaign creation wizard.
There are five steps in the wizard:
Localization - choose the campaign language (optional). This step will only appear if you have configured languages and translations. See the Localization section of the documentation to learn more.
Details – customize your campaign welcome information, user messaging and legal details.
Form Builder – create a customized form for user entry.
Settings – create a UGC upload for entry, customize campaign restrictions and edit visuals.
Schedule – mark down campaign flight dates.
Complete all steps in the wizard to create your custom campaign.

Localization
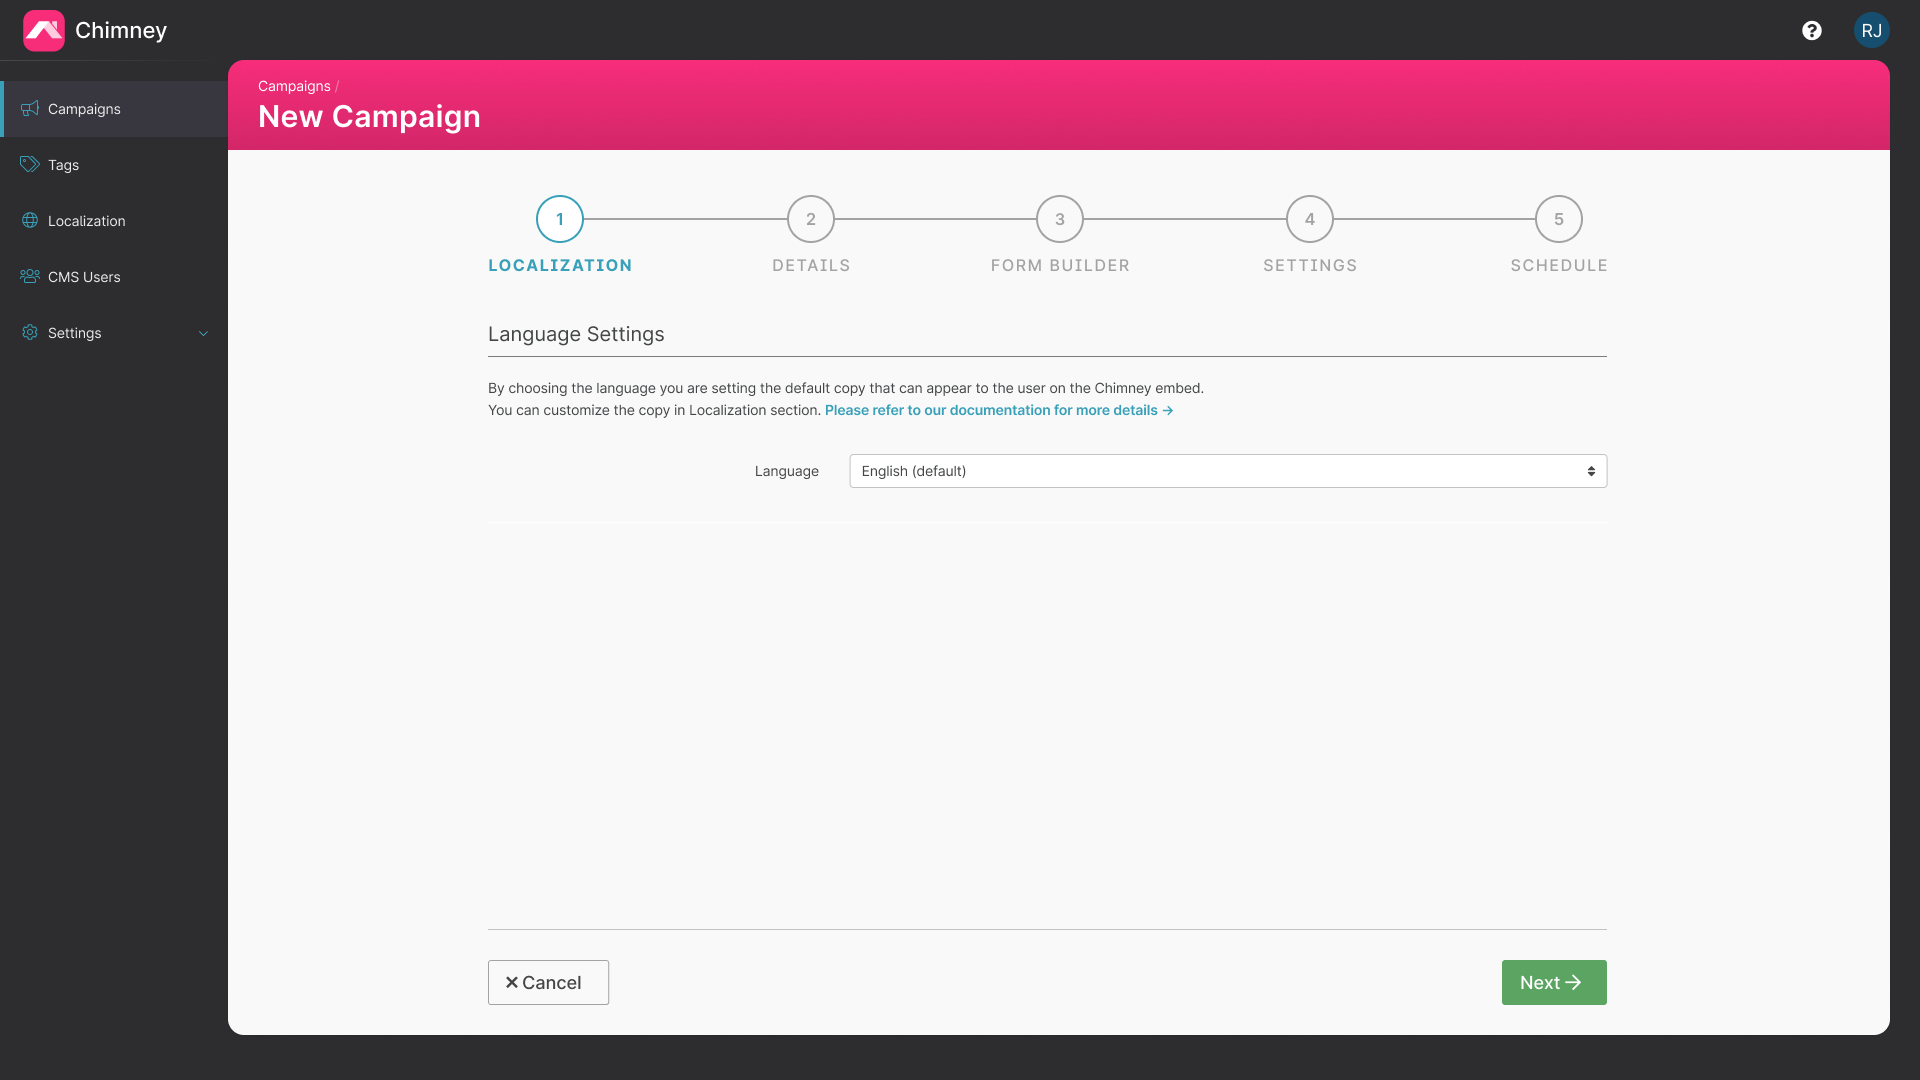
If you have more than one language configured in the Localization section, you can select which language you want to present your campaign to your users in.
Choose your language from the dropdown then click "next".
Details
Welcome Section
Use this section to construct your campaign welcome screen. This will be the first thing users see on your webpage to introduce them to your campaign. Here you can:
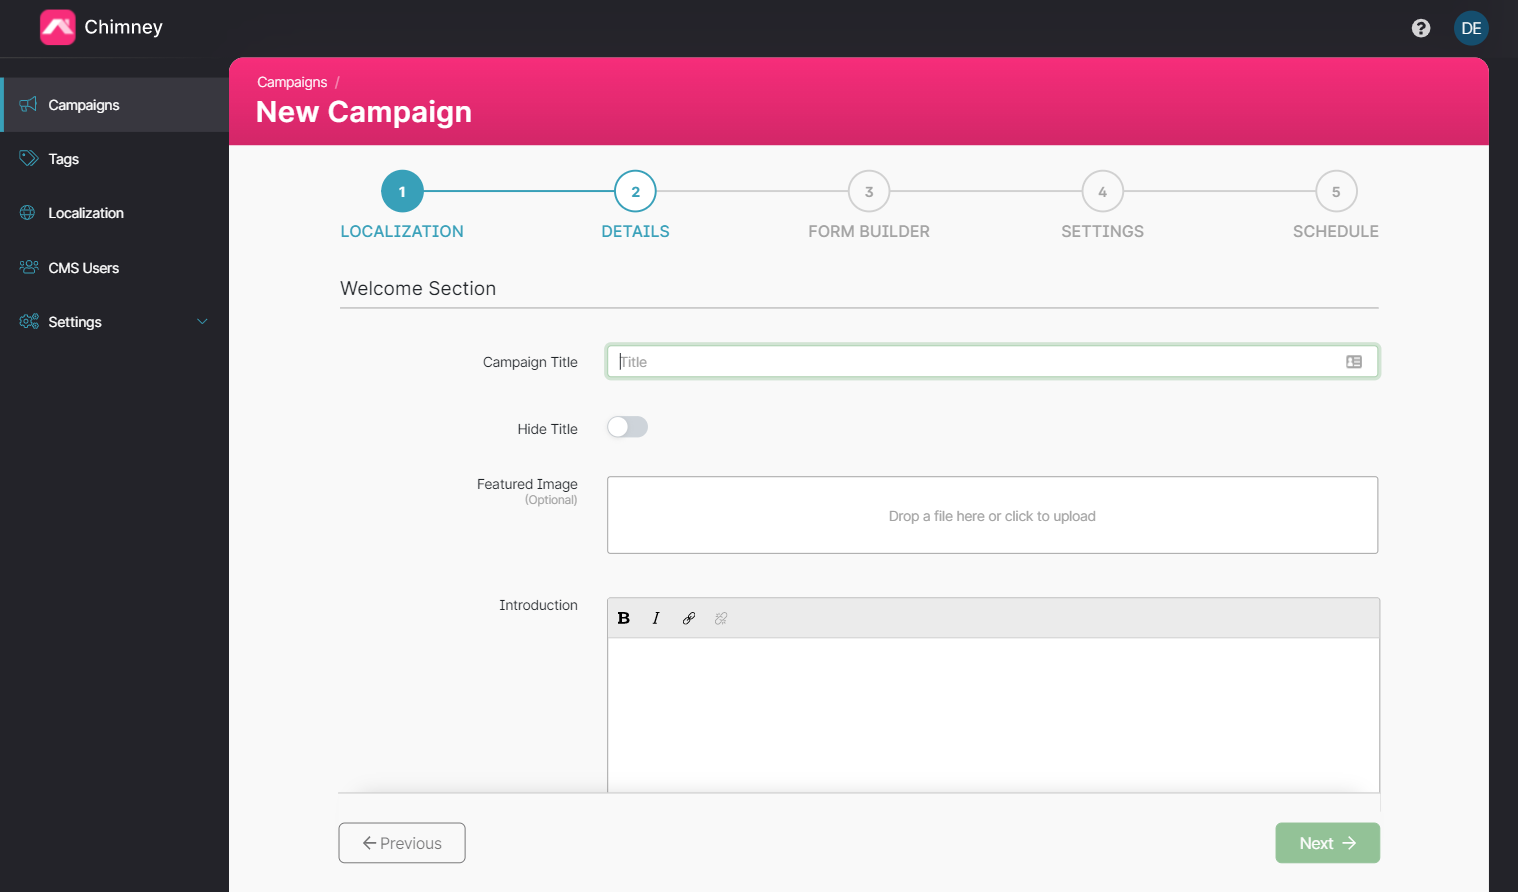
Use the dialogue box to add your campaign title.
We require a title so you can identify your campaigns in the campaign index
This title will also be visible on the front-end of your campaign unless you activate the "Hide Title" toggle.
Add an optional campaign feature image to catch user attention. This feature image will be visible to users through all steps of the entry flow. To add, either:
Drag and drop an image into the upload field.
Click on the upload field and select an image.
You can remove the image by hovering over the existing image and clicking the remove (-) symbol.
Add introductory text to give the user context of the campaign. To do so, use the dialogue box provided and use the text formatting tools to present your introduction as desired. To add a link to your text:
- Click the link symbol.
- Add a link title and target, then click "Add".
- The link will appear in the dialogue box.
- Click on the link in this view to test.
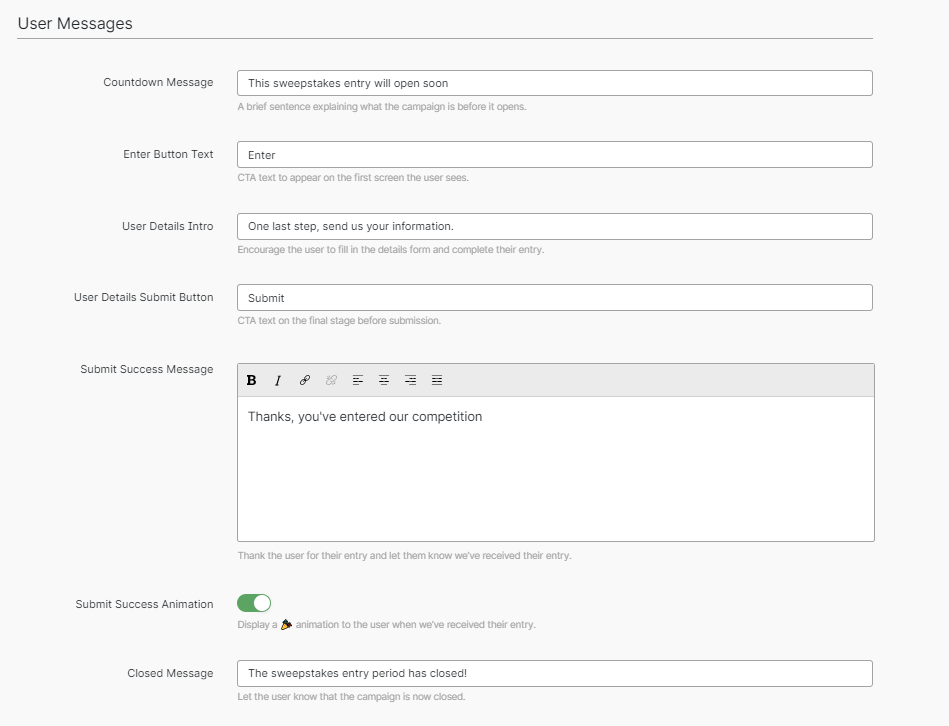
User Messages
Use this section to add custom text prompts for key steps through your campaign to keep your user engaged and informed. You can add custom messages for the following:
Countdown message – this will be present on the countdown screen, when the campaign is not yet open.
Enter Button Text – this is the text that will appear on the button to enter your campaign
User details intro – this will be the introductory text for the campaign form page.
User details submit button – this is the CTA for form submission.
Submit success message – this will be present when the user has completed the form and clicked the submit button. Use the dialogue box provided and use the text formatting tools to present your introduction as desired. To add a link to your text:
- Click the link symbol.
- Add a link title and target, then click "Add".
- The link will appear in the dialogue box.
- Click on the link in this view to test.
Submit success animation – this toggle controls whether the user sees a 🎉 animation alongwise the success message when they have submitted the form.
If no custom messages are created, your campaign will use the default text shown. If you have started to edit, but want to resort back to the default text, simply clear the field.
Legal & Rules
Use this section to add disclaimer copy to the foot of your campaign across all screens, excluding the UGC upload journey (if applicable).
Use the dialogue box provided and use the text formatting tools to present your legal footer as desired. To add a link to your text:
Click the link symbol.
Add a link title and target, then click "Add".
The link will appear in the dialogue box.
Click on the link in this view to test.
When these three details sections are complete, proceed to the form builder by clicking "Next".
Form Builder
The form builder gives you total control of what information you ask your users to provide for each campaign. Here, you can:
build a list of form fields and choose in what order they should appear,
mark certain form fields as required; users will be unable to submit the form unless they fill in a required form field,
set word or character limits on longer text form inputs.
See Form Field Types for a breakdown of the different types of form fields you can add in the form builder.

To create a customized campaign form:
Add your first form field by clicking "Add Field".
Select a field input type from the dropdown menu.

Each field type must be given a label name.
- By default, the label is shown to the user as placeholder text in the form input box and disappears once they begin typing. To instead display the label above the form input, turn the "Show Label" toggle on.
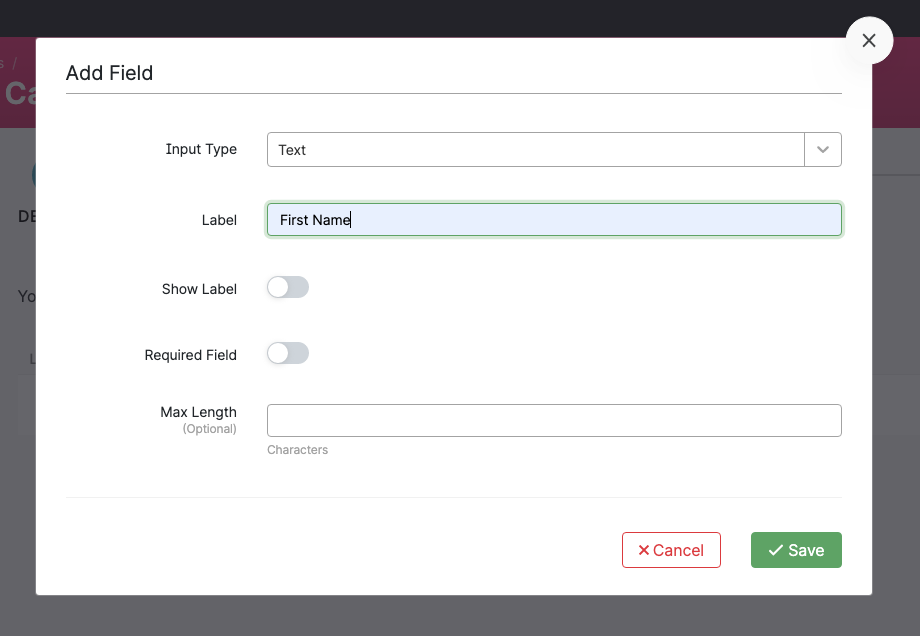
Adjust the field settings. See the Form Field Types for more information.
Optional: click the "Required Field" toggle to make the form field required. Users will be unable to submit the form if this field is empty and an error message will be displayed next to the field if they try.
Click "Save" to complete field creation.
Your field should now be listed in the form builder index.
You can edit, delete and order your form fields from the index. The order of the index reflects the order that the fields will be presented to the user in the campaign form.
Settings
User Generated Content (optional)
Enable User Generated Content (UGC) if you would like users to upload content such as videos, images or files with their entry into the campaign. When this is enabled an extra step in the front-end embed is shown to users prompting them to upload files from their computer or device.
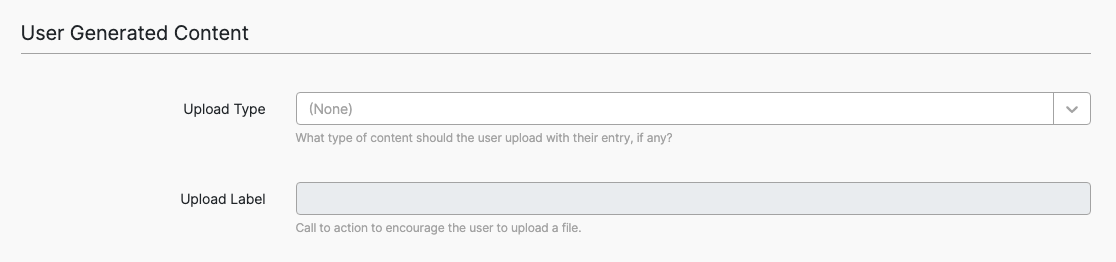
To enable UGC upload:
Select an upload type from the dropdown menu.
Use the "Upload Label" input to create a custom CTA to encourage and inform user upload. If this is left blank, default copy will be used.
Leave the Upload Type as "(None)" if you do not wish to collect UGC in your campaign.
Restrictions
The Restrictions section allows you to impose certain optional limits and restrictions on users entering your campaign.
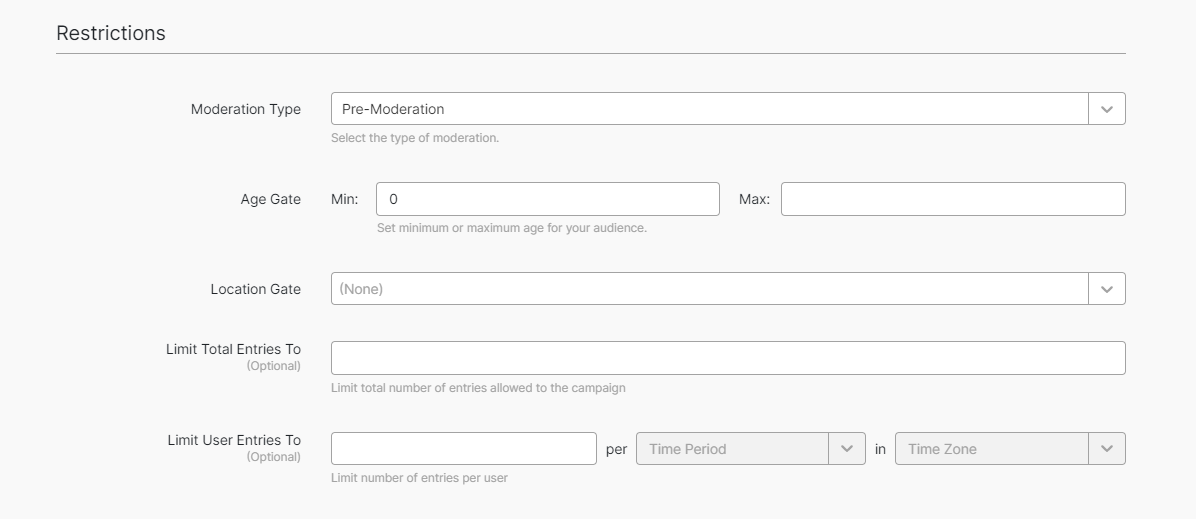
Moderation Type - use this to set your moderation workflow for the campaign. For more details see Moderating Entries:
Pre-moderation - all entries enter the entries management list as hidden and require approval to become visible.
Post-moderation - all entries enter the entries management list as visible and can be rejected and hidden if required.
Age Gate - set a minimum and/or maximum age your users must be to enter. If a minimum age is set, users will be asked to enter their age before they can submit data. If they are too young (or too old), the user will be blocked from entering and a temporary cookie will be placed on their device so they cannot attempt to enter the same campaign again that day. The values here are inclusive, so if your minimum gate is set to 15, then this means that 15 years olds are allowed.
Location Gate - only allow users from specific countries to enter. You can select one, multiple or no locations. When at least one country is selected, users outside that(those) country(countries) are blocked from entering.
Limit Total Entries - set a maximum limit on the number of entries for the whole campaign. Once your campaign has this many entries, users are blocked from submitting further entries.
Limit User Entries - set a maximum limit on how many times a single user can enter the campaign. You can impose this limit per day, week, month, or for the entire duration of the campaign.
An individual user is identified by their email address. For this feature to work you must add a form field with the type "Email" in the form builder.
Days, weeks, and months are counted by calendar date. We ask for a timezone to ensure this is accurate for your region.
Customer Relationship Management Settings
If CRM export settings are available for your tenant, enable "Include in CRM Export" to include campaign entries in the daily CRM export. Select the campaign's target market from the Country dropdown, then enter the 8 digit Competition ID supplied for the campaign.
Visual Settings
You can edit the theme colors of your embed by selecting a Hex value from the color pickers available. The colours you can change are:
- Background Color - the background color of the whole embed,
- Font Color - the color of all text in the embed,
- Button Color - the background color of buttons and calls-to-action in the embed,
- Button Font color - the text color in buttons and calls-to-action in the embed.
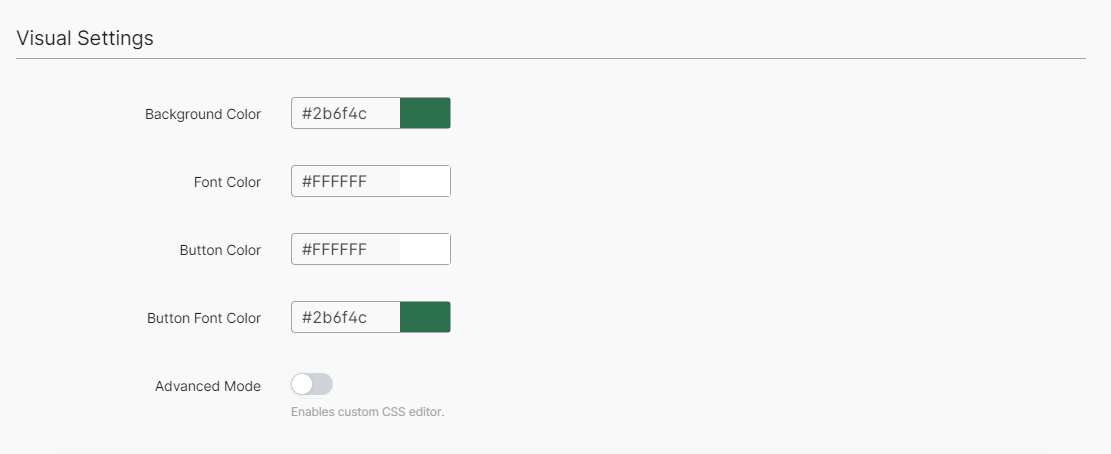
If your tenant has a selection of presets available, then you will be presented instead with a dropdown list of your presets. You are still able to choose a custom color by selecting "Custom", whereby a picker will appear to allow you fine-grained color selection.

There is also an "Advanced Mode" toggle. Enable this if you want to add your own CSS code to modify the embed theme.
Click "Next" when you are happy with the campaign settings.
Schedule
The last step in the wizard allows you to schedule flight dates for your campaign. Note that this will not publish your campaign on selected dates but will change what displays in your embed. See the "Campaign Status" section to see how scheduling affects your embed.
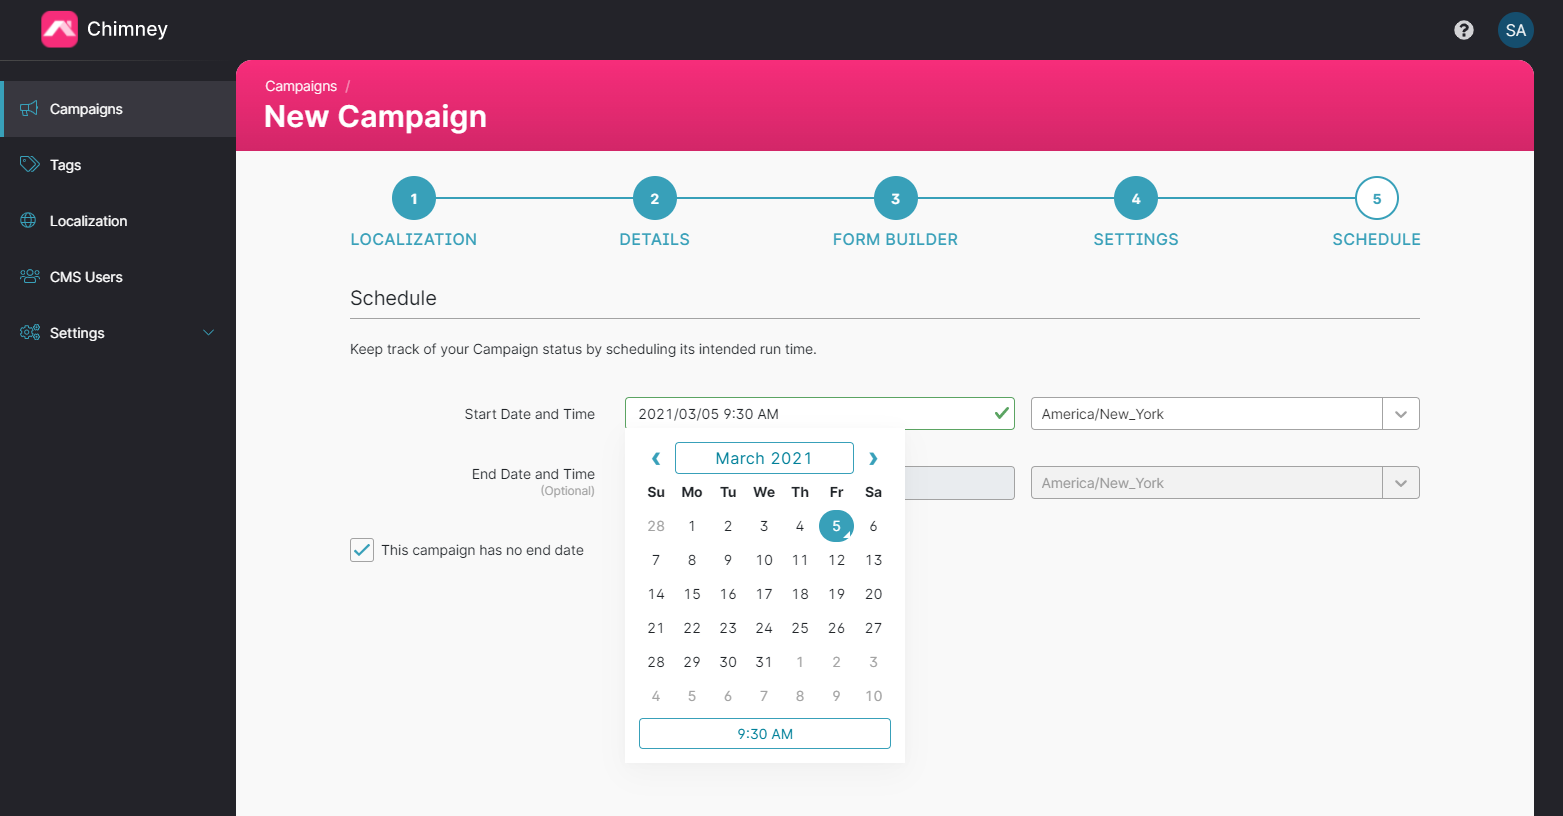
Campaigns are marked as "Scheduled" before their start date has passed, "Open" after their start date and before their end date has passed, and "Closed" after their end date has passed.
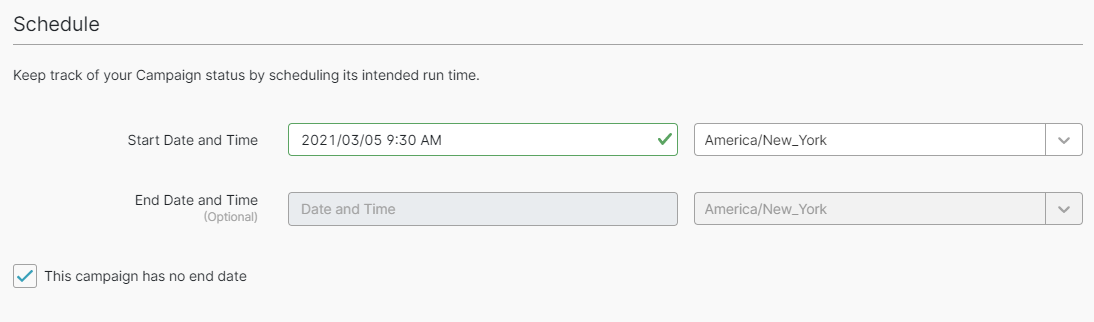
To schedule:
Click on the start date and time field. From the calendar select a campaign start date.
To adjust start time, click on the timestamp within calendar view. Use the arrows in the time editor to update campaign start time. By default times are set in your preferred time zone, but you can choose to set time in another time zone if you wish.
If the campaign has an end date, uncheck the box and repeat steps 1 and 2 for campaign end date and time.
Save your campaign.
Once you have completed all 4 steps of the wizard and click "Save" you will be navigated to the Campaign Manager for your new Campaign.